Replacing batteries in your Swiffer Power Mop is a straightforward process that can significantly extend the life of your cleaning tool. Many users often face confusion or frustration when it comes to battery replacement, but with the right guidance, you can easily accomplish this task in minutes. Whether you're a first-time user or someone who has been using the Swiffer Power Mop for years, understanding how to put batteries in swiffer power mop correctly is crucial for maintaining optimal performance. Let’s dive into a comprehensive guide that simplifies the process for you.
As more households adopt cordless cleaning solutions, the Swiffer Power Mop has become a popular choice for its convenience and efficiency. However, like any rechargeable device, its battery may eventually need replacement. This article will provide step-by-step instructions to ensure you replace the batteries safely and effectively. By following our tips, you can avoid common mistakes and ensure your mop continues to deliver powerful cleaning performance.
For those who want to maximize the longevity of their Swiffer Power Mop, learning how to put batteries in swiffer power mop is essential. Not only does proper battery care enhance the lifespan of your device, but it also ensures consistent cleaning power whenever you need it most. Let’s explore everything you need to know to keep your mop running smoothly.
Read also:Diamond Baseball Holdings A Comprehensive Guide To The Future Of Sports Investments
Why Is It Important to Learn How to Put Batteries in Swiffer Power Mop?
When your Swiffer Power Mop begins to lose power faster than usual, it might be time to consider replacing the batteries. Understanding the importance of timely battery replacement can save you money in the long run by extending the life of your mop. Additionally, knowing how to put batteries in swiffer power mop helps prevent potential damage caused by improper handling or incorrect installation.
One of the key benefits of mastering this skill is the ability to troubleshoot common issues on your own. Instead of relying on professional repairs, you can quickly resolve battery-related problems and get back to cleaning with ease. This not only boosts your confidence as a user but also enhances your overall experience with the product.
How to Know When It's Time to Replace the Batteries?
Before jumping into the replacement process, it’s crucial to identify the signs that indicate your Swiffer Power Mop’s batteries are nearing the end of their lifespan. Some common indicators include reduced runtime, difficulty charging, or erratic behavior during use. If you notice any of these symptoms, it’s likely time to replace the batteries.
Another important factor to consider is the age of your mop. Even if it still functions adequately, older batteries may lose their capacity over time, affecting performance. Regularly assessing the condition of your batteries ensures your Swiffer Power Mop remains reliable and efficient for years to come.
What Tools Do You Need to Replace the Batteries?
Fortunately, replacing the batteries in your Swiffer Power Mop doesn’t require extensive tools or technical expertise. Here’s a list of what you’ll need:
- Replacement batteries compatible with your Swiffer Power Mop model
- A small Phillips-head screwdriver
- A clean, dry workspace
- Protective gloves (optional)
Having these items on hand will make the process smoother and more efficient. Ensuring you have the correct replacement batteries is especially critical, as using incompatible parts can damage your device or void the warranty.
Read also:Discover The Best Of Radammcom A Comprehensive Guide To Your Ultimate Travel Experience
How Can You Safely Remove the Old Batteries?
Once you’ve gathered your tools, it’s time to carefully remove the old batteries from your Swiffer Power Mop. Start by unplugging the device and turning it off to avoid any accidental activations. Locate the battery compartment, which is typically found at the base or handle of the mop.
Using your screwdriver, gently unscrew the cover plate securing the battery compartment. Be cautious not to apply too much force, as this could damage the housing or internal components. Once the cover is removed, carefully extract the old batteries, ensuring you dispose of them responsibly according to local regulations.
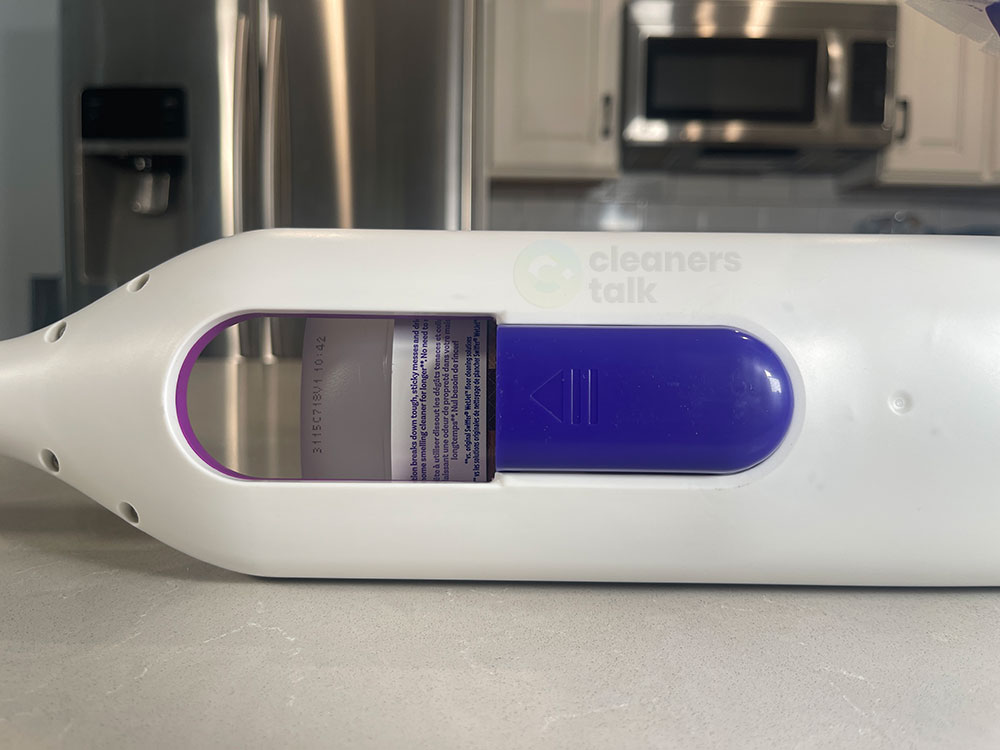
How to Put Batteries in Swiffer Power Mop Properly?
With the old batteries removed, it’s time to install the new ones. Begin by aligning the positive (+) and negative (-) terminals of the batteries with the corresponding contacts inside the compartment. Gently press the batteries into place, ensuring they are securely seated.
Once the batteries are installed, reattach the cover plate and tighten the screws firmly but not excessively. Double-check that the cover is fully secured before attempting to power on your Swiffer Power Mop. Testing the device after installation is a good practice to ensure everything functions correctly.
What Are Some Common Mistakes to Avoid?
While replacing batteries may seem simple, there are a few common mistakes users often make. One of the most frequent errors is installing the batteries backward, which can lead to improper connections or even damage the device. Always verify the polarity before inserting the batteries.
Another potential pitfall is over-tightening the screws when reassembling the cover plate. Applying too much pressure can crack the housing or strip the screws, making future maintenance more difficult. Taking your time and being meticulous during each step will help you avoid these issues.
How Often Should You Replace the Batteries in Your Swiffer Power Mop?
The frequency of battery replacement depends on several factors, including usage patterns and environmental conditions. On average, most rechargeable batteries last between 18 months to 2 years before showing signs of degradation. However, heavy use or exposure to extreme temperatures can accelerate this process.
Regularly monitoring the performance of your Swiffer Power Mop allows you to anticipate when replacements will be necessary. By staying proactive, you can plan ahead and avoid unexpected downtime due to battery failure. Additionally, keeping spare batteries on hand ensures you’re always prepared for emergencies.
How to Extend the Lifespan of Your Swiffer Power Mop Batteries?
Proper maintenance plays a significant role in maximizing the lifespan of your Swiffer Power Mop batteries. Here are a few tips to help you get the most out of your device:
- Store the mop in a cool, dry place when not in use
- Avoid leaving the batteries fully charged for extended periods
- Charge the mop only when the battery level drops below 20%
- Clean the battery contacts regularly to prevent corrosion
Implementing these practices not only improves battery longevity but also enhances the overall performance of your Swiffer Power Mop. Consistent care and attention to detail can significantly reduce the need for frequent replacements.
Why Is It Important to Use Genuine Replacement Batteries?
While third-party batteries may seem like a cost-effective alternative, they often lack the quality and reliability of genuine replacement parts. Using non-original batteries can result in poor performance, safety hazards, or even damage to your Swiffer Power Mop. Always opt for manufacturer-recommended replacements to ensure compatibility and peace of mind.
Genuine batteries undergo rigorous testing and adhere to strict quality standards, providing optimal performance and durability. Investing in authentic parts ultimately saves you money by reducing the risk of costly repairs or premature device failure.
What Are the Benefits of Replacing Batteries Yourself?
Replacing the batteries in your Swiffer Power Mop yourself offers numerous advantages beyond cost savings. You gain valuable hands-on experience, improving your understanding of the device’s inner workings. This knowledge empowers you to handle future maintenance tasks confidently.
Moreover, performing battery replacements at home eliminates the need to schedule professional services, saving both time and money. By following our detailed guide, you can achieve professional-level results without leaving the comfort of your home. Embrace the opportunity to enhance your skills and take control of your cleaning tools’ upkeep.
Final Thoughts on How to Put Batteries in Swiffer Power Mop
Mastering the art of battery replacement for your Swiffer Power Mop is an empowering experience that enhances your cleaning efficiency. With the right approach and attention to detail, you can effortlessly maintain your device and enjoy uninterrupted performance. Remember to always prioritize safety, use genuine parts, and follow manufacturer guidelines to achieve the best results.
By incorporating the tips and techniques outlined in this article, you’ll be well-equipped to handle any battery-related challenges that come your way. Whether you’re a seasoned pro or a newcomer to the world of cordless cleaning, learning how to put batteries in swiffer power mop is a skill worth developing. Keep your mop in top condition and enjoy hassle-free cleaning every time.
Table of Contents
- Why Is It Important to Learn How to Put Batteries in Swiffer Power Mop?
- How to Know When It's Time to Replace the Batteries?
- What Tools Do You Need to Replace the Batteries?
- How Can You Safely Remove the Old Batteries?
- How to Put Batteries in Swiffer Power Mop Properly?
- What Are Some Common Mistakes to Avoid?
- How Often Should You Replace the Batteries in Your Swiffer Power Mop?
- How to Extend the Lifespan of Your Swiffer Power Mop Batteries?
- Why Is It Important to Use Genuine Replacement Batteries?
- What Are the Benefits of Replacing Batteries Yourself?